File Menu

Contents
File commands are used for general document handling and, for the most part, work the same as in other programs. The Project Overview window indicates which story file is open by displaying the file's name in the window's title bar. The File commands include:
Getting Started command
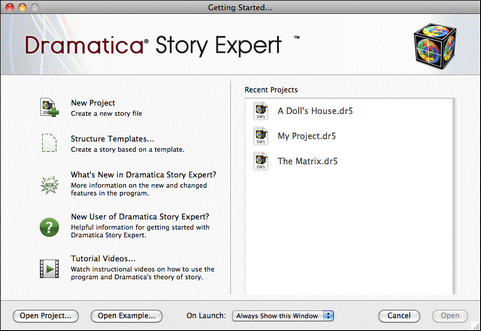
The Getting Started command opens the getting started window, which is the first window you see as a new user. This window has shortcuts to training videos, opening files, and more. Turn it on and off by checking and un-checking the Show this dialog on startup checkbox. Note: The Getting Started window automatically displays if you close all open documents.
New Document command
The New Document command creates a new, empty Dramatica project file called “Untitled." Dramatica automatically creates a new story file each time the program is started unless you have the preference to open up the last opened document chosen (see File Preferences).
New Document From Template command
This command creates a new project file using one of Dramatica's structure templates, such as templates for screenplays, novels, and short stories. These templates come with pre-made character and scene or chapter suggestions.
Open command
The Open command opens previously saved story files.
Open Example Story... command
The Open Example Story command easily lets you open any of the Dramatica example story files found in the Examples folder. These may be files you created and saved and put in the Examples folder, or the example story files shipped with Dramatica.
Close command
The Close command closes the current active window. If the Dramatica desktop is the current active window, the currently active story file is closed also. If the document needs to be saved, Dramatica prompts you.
Save command
The Save command saves changes to your story file. If you do not want to overwrite your original story file, use the SAVE AS… and SAVE A COPY AS… commands.
(Note: In addition to saving the changes you make to your story files, make sure that you occasionally make backup copies of your work to floppy disk, tape drive, or file server. If some sort of hard disk or system problem occurs, you don't want to lose the only copy of your work.)
Saving is a quick process. You should save often.
Save As. . . command
The Save As… command saves a copy of your story file under a different file name. You can make multiple versions of a work in progress by keeping separate drafts.
The original version of the story file is closed unchanged, and the new version of the story file is open and ready for you to continue your work.
If you try to save as the same name as your original story file, the Save As… command may ask if you want to overwrite the existing file. If you answer yes, Dramatica will behave as if you had executed the Save command and overwrite your original story file.
Save A Copy As. . . command
The Save A Copy As… command differs from the Save As… command only in that the original story file is left open, while a copy (complete with changes) has been saved under a different name. This command is particularly useful if you want to work consistently in one file, yet save a series of drafts as you work.
Export. . . command
Selectable only when you have the Reports window open, the Export command lets you save the contents of a Report to a text file. Exporting report text is especially useful as a transition from the story development stage (in Dramatica), to the writing and/or rewriting stage (in your word-processing software). The text file(s) can then be opened in your word processing program and used to guide the writing/rewriting of your story.
Export to Screenwriter. . . command
The Export to Screenwriter command lets you export much of your Character work and Scenes/Acts/Chapters created in Storyweaving to the Movie Magic Screenwriter software program.
Page Setup… command
The Page Setup command controls general page options like image orientation, paper size, etc.
Print command
Selectable only when the Reports window is open, the Print command sends the report displayed on-screen to the printer. The Preview button found in the Print window lets you view a report onscreen before you print it, showing you the effects of your printing setup and preferences.