Project Overview Lower Part

Contents
The lower part of the Project Overview looks like this:
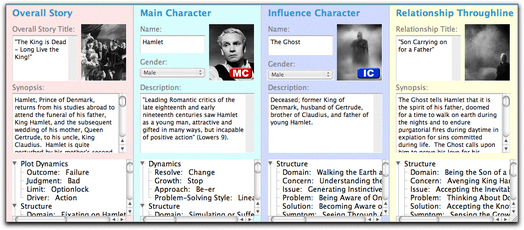
The lower part of the Project Overview window is divided into four equal section, one for each of the four throughlines in a story. The are displayed as follows, from left to right:
•The Overall Story Throughline
•The Main Character Throughline
•The Influence (Impact) Character Throughline
•The Relationship Throughline
Each throughline has the following items:
Throughline Title or Character Name: |
For character throughlines, enter the characters' names. The default names are "the Main Character" and "the Impact Character." For the Overall Story throughline and the Relationship throughline, enter a SHORT, descriptive phrase that identifies the throughline. For example, "Destroying the Death Star" (Star Wars: A New Hope) or ""Montagues vs. Capulets" (Romeo and Juliet) might work for the Overall Story throughline titles. For Relationship throughline titles, you might write "Mentor/Student" (Star Wars), or "Star-cross'd Lovers" (Romeo and Juliet). Please, keep it SHORT. |
Throughline Synopsis: |
Enter a description of what goes on in the throughline. Feel free to touch on elements of character, plot, theme, and genre explored in the throughline. Keep in mind that you should limit the synopsis to events that happen in that throughline. NOTE: When describing characters in the Overall Story throughline, it is best to refer to the characters by their job, or role, or function in the story at large instead of their proper names. For example, the baker, the spoiled teenager, the bank executive. |
Story Point Choices: |
As you make storyforming choices in Dramatica Pro, those choices display at the bottom of each throughline's section. NOTE: These choices are displayed here but cannot be changed here. Go to the storyforming tools, such as the StoryGuide or Story Engine to make changes to the storyforming choices. |