StoryGuide
|
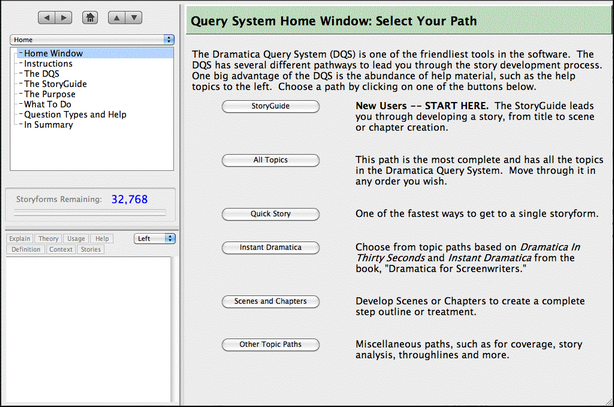
The StoryGuide is Dramatica's step-by-step tutorial for creating a story. It's specifically designed to give writers new to Dramatica an ideal path for building their story with Dramatica. |
The StoryGuide tutorial takes place entirely online. It can be accessed in two ways:
•Select the Project>StoryGuide command, and then click on the StoryGuide button.
•Click on the StoryGuide icon in the icon toolbar, and then click on the StoryGuide button.

The StoryGuide window presents you with a choice of three paths to creating your story. It's not necessary to go through all three paths -- but if you do, all the work you do in one level appears in the others.
Level 1
Click on this button for the quickest path to creating a story. Though this path doesn't utilize every element of the Dramatica model of story, you may find it contains enough to get you started on your story. Writers of shorter dramatic stories, such as short stories, one act plays, and sitcoms will find plenty to work with here.
This path is designed to be followed from beginning to end, answering the questions in the order presented.
•All the creative work you do here shows up in the Level 2 and Level 3 paths and in other parts of Dramatica.
•Printing a report at each stage of the StoryGuide is optional, though it does provide a handy reference tool.
•After responding to each question, press Enter or Shift+Enter to advance to the next one.
•The Level 1 StoryGuide path contains approximately 60 questions.
Level 2
The Level 2 path helps you develop your story on a somewhat deeper level than the Level 1 path, mainly presenting more Main Character and Theme development.
This path is designed to be followed from beginning to end, answering the questions in the order presented.
•All the creative work you do here shows up in the Level 3 path and in other parts of Dramatica.
•Printing a report at each stage of the StoryGuide is optional, though it does provide a handy reference tool.
•After responding to each question, press Enter or Shift+Enter to advance to the next one.
•The Level 2 StoryGuide contains approximately 75 questions.
Level 3
Click on this button to develop your story in much fuller depth. All four throughlines are fully developed with their own Concerns, Problems, Themes, and Signposts & Journeys. You are able to skip questions and answer them later, or even let Dramatica supply the answers based upon your other decisions, when possible.
•All the creative work you do here shows up in other parts of Dramatica.
•Printing a report at each stage of the StoryGuide is optional, though it does provide a handy reference tool.
•After responding to each question, press Enter or Shift+Enter to advance to the next one.
•The Level 3 StoryGuide path contains approximately 250 questions.
Structure Templates
The quickest and easiest way to create a story in Dramatica is by opening a structure template and using the Level 1 path of the StoryGuide. There are a number of templates to choose from, e.g., screenplay, novel, short story.
Each comes with an appropriate number of archetypal characters already created, ensuring that each character has a clear dramatic function in the story. If these characters are sufficient for the story you want to tell, just change their names and develop them as prompted. You may delete characters or create more as needed, but at a minimum you'll need to keep the Main Character and Impact Character.
Other than having characters already created, the first three sections of the StoryGuide path-Getting Started, Storyforming, and Illustrating-are the same. When you reach the Storyweaving section, you'll notice the greatest difference.
A complete step outline has been constructed for you, presenting the story's dramatic elements in an order suggested by traditional models of story structure. You may be familiar with these elements from your previous writing studies. Attached to each step are the Dramatica story points you created by answering questions in the Storyforming section, and the examples you wrote in the Illustrating section.
Each step may represent one or more scenes, depending on the needs of your story. You may rearrange, add, or delete steps once you understand the Storyweaving section. It is recommended that you print the Story Treatment first, to have as a reference.
The title of each step indicates the dramatic function of that step, and explanatory text within each step tells you what to write about in each scene. You may delete this text, overwrite it with examples that you copy and paste from the lower text window, or leave it in the step to remind you of the step's dramatic function.
Bear in mind that these are example story structures, and may not fit every story that you have in mind. For example, the screenplay template tends to favor the commercial Hollywood film-it's a good fit for the love story, romantic comedy, buddy movie, and action adventure genres.
To use a structure template:
1.Select the File>New Document from Template... command..
2.In the dialog box that displays, select a template to open, e.g. Novel.
3.The Project Overview window displays the new document with "Untitled" in the top title bar.
4.Click on the StoryGuide icon in the icon toolbar, or select the Project>StoryGuide command..
5.Choose one of the three paths by clicking on its button, e.g., Level 1.
6.Under the File menu, click on Save As to save the file under a new name for your story, e.g. MyStory.
7.Start creating your story!
