
To print your Index Cards, click the Print button on the bottom Toolbar. You will be taken to the following window:
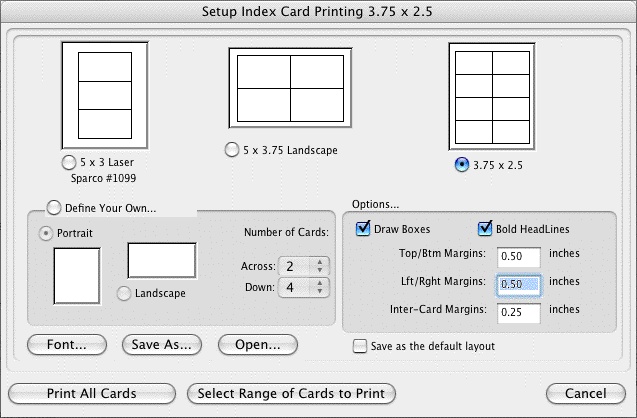
The three large page icons across the top of the screen are pre-defined layouts. Select one by clicking on its icon or radio button.
The layout at the top right of the screen, 3-3/4 x 2-1/2, is the default layout.
Create a new layout by clicking on the Define Your Own... button. Choose Portrait or Landscape, and enter the number of cards Across and Down for your page.
Several other settings are available:
• |
Draw Boxes—Prints a box around each Index Card. Recommended if you are not printing onto plain paper. |
• |
Bold Headlines—Prints the Scene Heading Line of each card in boldface. |
• |
Page Margin Settings—Allows you to change the Top/Bottom, Left/Right, and Inter-Card (between cards) margins. |
• |
Font Button—Allows you to specify a different font for the Index Cards than for the document. Times New Roman 10 pt is often a good choice, as it gets more text on each card than the standard Courier New 12pt. |
• |
Save As—Saves Index Card layouts as separate files, automatically adding the extension .CRD for you. |
• |
Open—Loads a previously saved Index Card layout. |
• |
Save as the Default Layout—Loads the current settings every time you select Print Index Cards in the future. |
To print all your Index Cards, click on the Print All Cards button.
To print certain cards only:
1. |
Click on the Select Range of Cards to Print button. You are returned to Index Card View. |
2. |
The cursor changes to an arrow with a box saying “Select 1st Card to Print.” Click on the first card you want to print, and it turns a darker gray. |
3. |
The cursor text changes to “Select last Card to Print.” Click on the last card you want to print, and it also turns darker gray. |
To print one index card only, select it as both the 1st and Last card to print.
The range of cards you selected are sent to the printer.
