Outline elements (and some document elements) can be promoted or demoted in the Outline panel. What does this mean? Promoting/demoting is a term used to describe changing an element from one level of an outline to a "higher" or "lower" level in the outline hierarchy. There are a few different ways to promote/demote an element.
Open the tutorial template:
1. |
Click on File > New from Template... |
2. |
Double-click the Tutorials folder and open the file called "Promoting & Demoting Tutorial". |
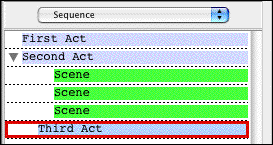
This tutorial file has three levels available: Act, Sequence and Scenes.
Promoting/Demoting via Keyboard
1. |
Press CTRL+DOWN ARROW until the caret is blinking in the Third Act. |
2. |
To demote the Act to a Sequence, press CTRL+RIGHT ARROW. |

3. |
To promote an element, press CTRL+LEFT ARROW. |
Promoting/Demoting via Drag and Drop
1. |
Open the Outline panel on the left if it is not already open. |
2. |
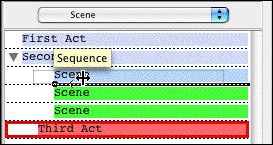
Hold the mouse button down on the first Scene (green). Notice, as you drag it left or right, it shows what level in the hierarchy it will become. |
3. |
Drag it so that it says Sequence and drop it. The outline element is now converted to a Sequence (red) and has the proper margins. |

You can use the Promote/Demote icons on the Top Toolbar to promote and demote elements.

Also, you can promote and demote via the Promote/Demote Outline Element items in the NaviDoc menu.

