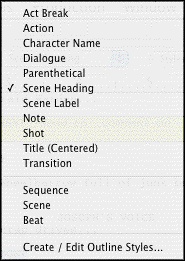
You can insert Elements in a number of ways:
• |
Click on an element in the Current Element drop-down list. |

• |
Click on the element's icon on the Right Toolbar, if displayed. |
• |
Press a Control-key shortcut for that element (See the Appendix chapter entitled Key Assignments for details). |
• |
In certain formats, certain text is automatically formatted in certain elements. Examples are:: |
• |
"int." or "ext." on a blank line of Action will convert it to in a new Scene Heading. |
• |
"fade in:" on a blank line of Action will automatically capitalize it to "FADE IN:". |
• |
any single word followed by "to:" (on a blank line of Action) will convert it to a Transition and make it uppercase and flush right. |
• |
"newact" will insert a Act Break element with the next consecutive numbering. |
• |
"sameact" will insert a Act Break element with the current numbering. |
• |
"newscene" will insert a Scene Label with the next consecutive numbering. |
• |
Select the File > Insert Element... command or clicking on the Insert element button on the Top Toolbar. |
• |
Click the Add Outline Element drop-down list on the Outline panel in the NaviDoc. |
• |
Click the Add Note Element drop-down list] on the Notes panel in the NaviDoc. |
